Free 2nd Day Shipping on orders above $50.
Free 2nd Day Shipping on orders above $50.
Today, you’ll find a printer or two in almost every school, household, and office. From printing memorable photos to everyday documents and reports, it has become an essential tool in the modern world. Nevertheless, the handy printer has its fair share of flaws that can sometimes leave users in disarray.
One of the most frustrating things you may experience with a printer is when it suddenly prints blank pages. And if you’re working on a crucial document or file, this problem can be quite maddening. Fortunately, there are ways to fix this issue so you can immediately get back to where you left off. They are also easy enough to do on your own even with little or no technical Know-how.

When your printer suddenly starts printing blank pages, you may immediately think that you’ve run out of ink. Thus, if you replace your printer ink cartridges with new ones, everything will return to normal. While an empty ink cartridge is a pretty common reason why this problem occurs, it isn’t always the case.
There are numerous possible causes for a printer that’s randomly producing blanks. The most common ones are empty ink cartridges, improper cartridge installation, and congested nozzles. Driver and software issues can sometimes cause this problem as well.
|
Running out of ink? Our remanufactured ink and toner cartridges are 4X CHEAPER than the branded ones! |
If your printer is printing blank pages, don’t panic and send your device to a repair shop in a hurry. You can avoid spending money on costly repairs by trying out the numerous solutions below. And regardless of what’s causing the issue, we can give you a step-by-step guide on how to fix it.

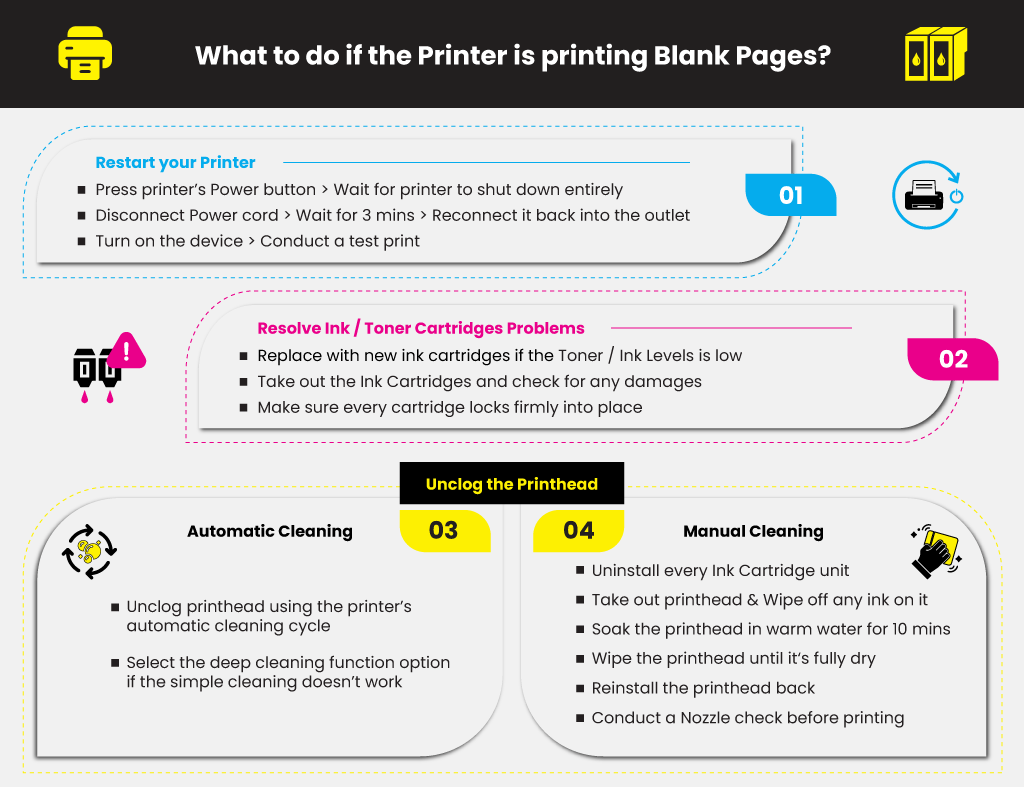
For most devices, a simple reset can sometimes resolve common mechanical or operational problems. Thus, it makes sense to try the most straightforward answer first and find out if it works. Reset your printer using these steps:
If there are issues with the ink cartridges, your printer won’t be able to generate regular printouts. Follow the steps below to make sure that your cartridges are fully operational and in good condition:
For more ink cartridge troubleshooting tips and tricks, click here.
Additional Tip for Laser Printers:
If you are using a toner with the drum unit, like a Brother DR630 drum, may require immediate replacement as well. With laser printers such as Brother MFC-L2740dw Toner, black spots or hazy printouts indicate that your drum unit is breaking down. When this happens, you’ll need to replace it with a new drum regardless if it’s a new brother toner cartridge. For more toner and drum troubleshooting tips and tricks, click here.
Shop Now for Compatible Brother Toner Cartridges & Get More Savings!
When it comes to inkjet printers, you can unclog the print head using the printer’s automatic cleaning cycle. You can activate this cycle from your printer’s control panel or at the Printer Properties from your computer’s Control Panel.
The process prompts your printer to discharge excess ink out, softening and removing clogs on the print head. Select the deep cleaning function option if the simple cleaning doesn’t work in unclogging the print head.
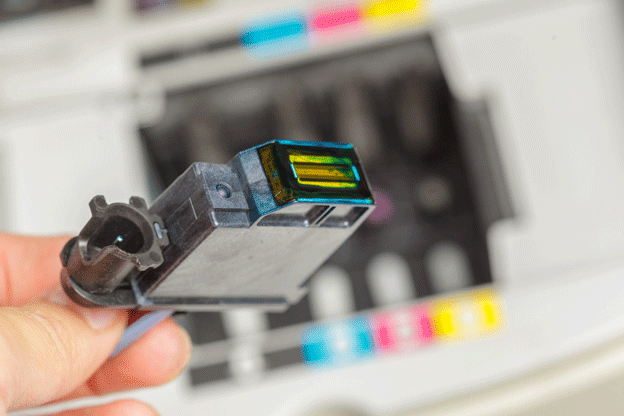
If the automatic cleaning method fails, you can also opt for a manual cleaning approach. Keep in mind that there are two kinds of print heads. There’s a print head that’s integrated from the cartridge, and there’s also a detachable type.
Avoid exposing and cleaning the sponge area of the ink tank when cleaning removable print heads. To prevent any direct contact of ink on our skin, use protective gloves throughout the process. Here’s a step-by-step guide on cleaning a printhead manually:

If there are still no changes, and the printer is printing blank pages again, repeat step 4. This time, however, allow the print head to soak for 2 – 3 hours or overnight, if necessary.
Below are the solutions you can do:
1. Check your ink cartridges
2. Restart your HP printer. Unplug its cables and reconnect them after a few minutes before turning your printer back on.
3. Troubleshoot your printer using the Windows troubleshooter
4. Download the HP Print and Scan Doctor app and then run it
5. Update your printer driver
6. Configure the Printer Spooler services and restore necessary files:
To fix this, try the solutions below:
You can solve this problem by following these solutions:
When your printer prints blank pages all of a sudden, it may also be due to driver and software issues. If this is the case, you may need to uninstall your printer driver and reinstall it back on your computer. Doing a software update can sometimes resolve the problem as well. If ever you encounter a “Printer Driver is Unavailable Error,” here’s how you can fix it.
susan waks
my hp4620 printer prints blank pages
Julia Page
Have you tried doing a print test? If you haven’t yet, I would suggest doing so. Here’s how:
1. Load plain white U.S. letter or A4 size paper in the tray.
2. On the control panel home screen, press the Setup icon.
3. Press the button next to the Down Arrow until Reports displays next to OK.
4. Press the button next to OK to select Reports.
5. Press the button next to the Down Arrow until Print Quality Report displays next to OK, and then press the button next to OK. The report prints.
The results will help you determine the issue. Also, you can check if the copier works as a stand-alone device. If it works fine, it is possible that this is a software issue. I hope this helps!
Rachel
So I’ve done everything on here save for cleaning the print heads manually, and I’ve tried using the copier, but it still prints blank. What can I do? My printer is a Brother MFC-J480DW
Julia Page
You can place a document with text or an image on the machine depending on your model and make a copy. If you are getting a completely blank page, this is an indication that there is a problem with the machine’s hardware. You can reach out to Brother’s customer care for more technical help.
However, if you are able to make a copy of the document. It is possible that the driver is corrupt or outdated. You can uninstall and install the printer driver.
1. From your Windows PC, go to the programs section and choose the control panel from the option.
2. Then select Program and features option to choose brother printer driver and click the “Uninstall” option.
3. Click on “Yes” to start the process and follow other onscreen instructions.
4. You have to restart your computer and install the latest version driver.
Ira Smith
Thanks for sharing the great information. Last week my hp printer was showing an error. I was checked, and the hp printer print head failed. I tried more things. BUt unsuccessful.
I searched on google and found your article. After reading your article. I followed those steps you mentioned. It really worked. Thanks
Lawrence
Saw the same on YouTube, where it suggested to turn off printer and restart computer) as your posting (6) below. It worked for me.
“6. Configure the Printer Spooler services and restore necessary files:
Launch the Services app on your computer
Stop the Printer Spooler service
Go to C:\Windows\System32\spool\PRINTERS and delete all of the files there.
Start the Printer Spooler service again”