How To Resolve The Top HP Deskjet 1112 Printer Ink Issues

HP Deskjet 1112 printer ink problem
Source: Freepik

“How do I get rid of the HP printer ink error?”

The previous question will be our main focus in this blog along with other ink cartridge problems you might encounter with your HP Deskjet 1112 printer. As a single-function inkjet printer that is designed for your basic printing needs, this printer should be pretty much easy to use and troubleshoot in case a problem occurs.

Though it is not that quite popular among users because of its limited features, it does its job in printing decent-quality documents at a 7.5-ppm speed. As you can see, it doesn’t print that fast so it is not ideal for bulk printing purposes.

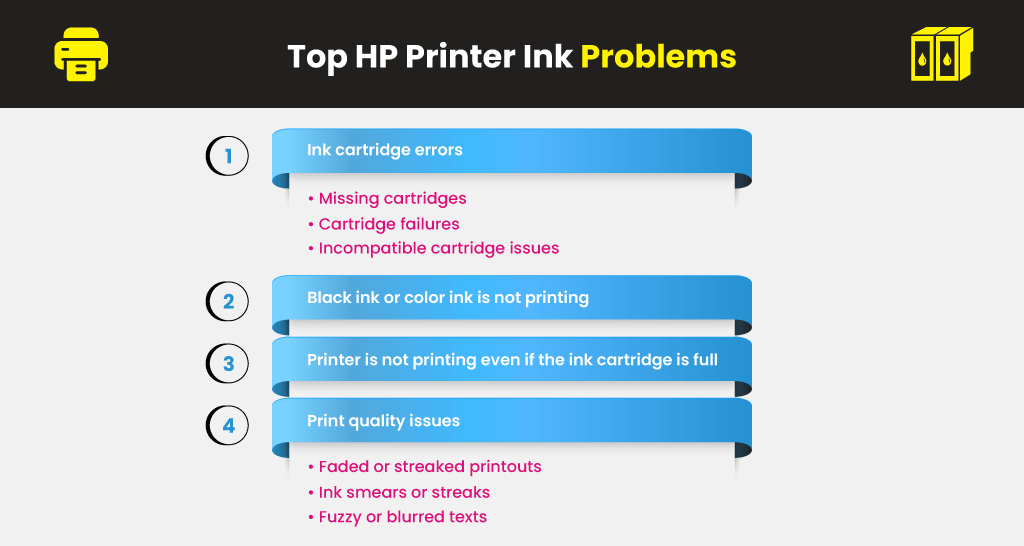
For those who have this printer and are encountering HP Deskjet 1112 ink refill problems and other related issues, you’ve come to the right place! Below are the common HP printer problems we are going to give solutions for here:
Top HP Printer Ink Problems to Solve Here

Top-HP-Printer-Ink-Problems
  • Ink cartridge errors such as missing cartridges, cartridge failures, incompatible cartridge issues, and missing cartridges
  • Black ink or color ink is not printing
  • Your printer is not printing even if the ink cartridge is full
  • Print quality issues such as the following:
    • Faded or streaked printouts
    • Ink smears or streaks
    • Fuzzy or blurred texts
HP Deskjet 1112
HP 63 XL

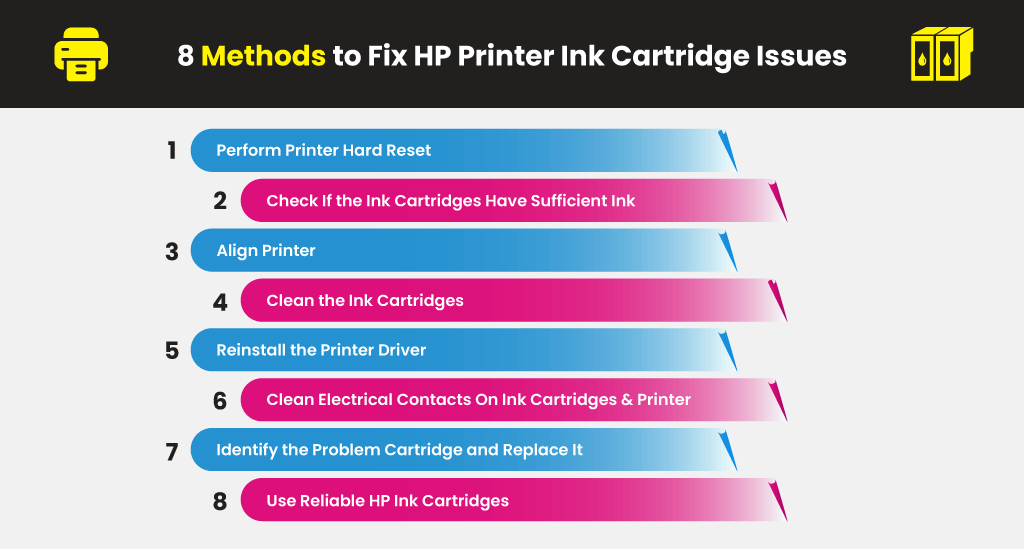
8 Methods to Fix the Above HP Printer Ink Cartridge Issues

Here are the recommended solutions we have compiled to get rid of ink issues on your HP Deskjet 1112 printer.

Learn More:

We recommend trying the first suggested methods before proceeding to the next ones until you find the one that works for you.
8-Methods-to-Fix-HP-Printer-Ink-Cartridge-Issues

Method #1: Reinstall your Printer’s Drivers

Doing a hard reset to your printer resets its internal memory to free space so that it will be able to recognize new changes to your printer. To do a hard reset on your printer, follow these steps:

  1. Switch on your printer.
  2. Wait for the printer to reach its idle state.
  3. Disconnect your printer’s power cord from its rear section while it is still powered on.
  4. Remove the power cord from your wall socket.
  5. Reconnect the cord to your wall socket as well as to your printer after 60 seconds.
  6. Turn your printer back on.

Method 2. Check If the Ink Cartridges Have Sufficient Ink

If you are encountering ink quality issues on your printouts, check if the remaining inks on your cartridges are not critically low. If the cartridges are empty, replace them with new ones.

Step 1. Check Estimated Ink Levels
      1. Load plain A4 or U.S. letter paper into your printer.
      2. Launch the HP Printer Assistant window by searching for your printer on your computer and opening it.
      3. Go to the Maintain Your Printer section.
      4. Click on Device Services.
      5. Click on Estimated Ink Levels.
 
Step 2. Replace Empty or Low Ink Cartridges

NOTE:

Even if your ink cartridges are not empty, try removing your ink cartridges and reinstalling them to make sure that they snap perfectly into their respective slots.

If it is your first time installing new cartridges, below is the proper way to do it:

  1. Lower your printer’s output tray.
  2. Hold the handle inside your printer and then open the ink cartridge access door.
  3. Wait until the printer carriage is in the middle of your printer.
  4. Push down the empty ink cartridge after the carriage becomes silent and idle. This will release the ink cartridge.
  5. Pull the empty cartridge to remove it from its slot.
  6. Get the new cartridge out of its packaging.
  7. Remove the protective strip of the new ink cartridge. Do NOT touch the cartridge’s metal contacts to avoid ink failure and poor electrical connections.
  8. Hold the sides of the cartridge and make sure that its nozzles are facing the printer.
  9. Insert the cartridge into the appropriate slot. (Black ink cartridges should go to the right and tri-color ink cartridges to the left).
  10. Slide the cartridge into its slot at an upward angle.
  11. Push the cartridge up gently until it clicks into place.
  12. Close the access door and try printing a document.

Method 3. Align Your Printer

Aligning your printer makes sure that your printer will produce accurate prints, especially if you have installed new ink cartridges or are switching between different paper thicknesses. Here are the steps to align your printer’s printhead:

  1. Make sure your printer is turned on and is connected to your computer.
  2. Open the HP Print Assistant window just like you did in Step 1 of Method 2.
  3. Go to Maintain Your Printer and then Device Services.
  4. Click on Align Ink Cartridges.
  5. Follow the on-screen instructions.

Method 4. Clean the Ink Cartridges

Dirty ink cartridges will produce streaks on your printouts. Below is how you can clean your ink cartridges automatically:

  1. Load clean paper into your printer.
  2. Again, go to the Device Services tab on the HP Printer Assistant window.
  3. Click on Clean Ink Cartridges.
  4. After the cleaning method is done, click Print to print a test page.
  5. Now, examine the printed test page.
    • For acceptable print quality, click Done and stop troubleshooting.
    • For unacceptable print quality, click on the Second-level Clean option when you are asked to. This will perform another cleaning process.

NOTE:

Badly clogged ink cartridges will need multiple cleaning processes. If this is the case, allow a 30-minute gap between each cleaning process.

Method 5. Reinstall the Printer Driver

For this method, an HP Deskjet 1112 software download is necessary. Also, you need to uninstall your HP printer driver, reinstall it, and then download a firmware update.

Step 1. Uninstall Your Printer Driver From Your Computer
      1. Disconnect your printer from your computer.
      2. Go to your computer’s list of programs.
      3. Find your printer and click Uninstall. Follow the on-screen instructions.
      4. After the uninstallation process, restart your computer.


Step 2. Reinstall the Printer Driver and Download Updated Firmware
      1. Go to HP’s official site.
      2. Search for your printer’s model and download the necessary driver and available firmware.
      3. Install the programs after the download process.


Step 3. Re-Add Your Printer to Your Computer
      1. Connect your printer to your computer and turn your printer on.
      2. Open your computer’s Control Panel.
      3. Click on View devices and printers under Hardware and Sound.
      4. Click on Add a printer.
      5. Wait for your computer to detect connected devices.
      6. Once your printer’s name appears, click on it.
      7. Follow the on-screen instructions.

Method 6. Clean Electrical Contacts On Your Ink Cartridges and Printer

If you receive an ink cartridge error message, remove the problematic ink cartridge and then clean its electrical contacts before inserting it back into your printer. For this method, you will need distilled water and a clean lint-free cloth or cotton swab.

  1. Remove the malfunctioning ink cartridge carefully as you did in Step 2 of Method 2. Again, do NOT touch the ink nozzles and electrical contacts.

*If you have inserted new ink cartridges and weren’t able to make them work, check if you have removed their protective tapes. If not, remove them and then reinsert the cartridges into your printer. See if the error disappears.

2. Dampen the lint-free cloth or cotton swab with water.

3. Clean the electrical contacts of the ink cartridges. Do NOT clean other parts EXCEPT the electrical contacts.

4. After cleaning the ink cartridges, clean the electrical contacts of your printer’s carriage.

5. Allow the electrical contacts to dry for about 10 minutes before reinserting the ink cartridges.

6. If you are still receiving the error, try cleaning the cartridges’ and printer’s electrical contacts again.

Method 7. Identify the Problem Cartridge and Replace It

If you receive an error saying that at least one of your cartridges is malfunctioning, identify which cartridge is causing the problem by doing the following:

  1. Uninstall the black ink cartridge first and observe the light from your printer’s Power button. A blinking Power light means that the tri-color cartridge is malfunctioning. Otherwise, it is okay.
  2. Do the same step but remove the tri-color cartridge this time to check if the black ink cartridge is the problem cartridge.

Method 8. Use Reliable HP Ink Cartridges

If none of the above methods has worked for you, your last option would be to replace the ink cartridges. If you are using third-party consumables, there is a big chance that your ink cartridges are incompatible with your printer. If you choose to buy consumables for your printer from third-party suppliers, choosing the cheapest one is not wise. Buying low-quality cartridges from unreliable suppliers will get you into bigger problems.


As a well-known supplier of ink and toner cartridges for various printer brands including HP printers, YoyoInk can provide you with high-quality compatible and remanufactured HP Deskjet 1112 ink cartridges. Our products are chosen by many users not only for their cheap prices but also because of their quality that is comparable with that of OEM consumables.

Wrapping It Up

Expensive or not, your printer is an important investment that you should take care of. Making sure that your printer is clean and buying high-quality consumables is important to prevent problems in the future including printer ink issues. For more guides on how to fix various HP printer ink problems, here are other blogs you can read:

Leave a Reply

Your email address will not be published. Required fields are marked *

YoYoInk